

Table of Contents
- Why LED Headlights Flicker: The Root Causes
- How to Install a CANbus Decoder for LED Headlights
- Troubleshooting Aftermarket Headlight Wiring
- Why Do LED Headlights Cause Battery Drain?
- Diagnostic Tools and Testing Procedures
- Heat Dissipation and Thermal Management
- Safety and Legal Compliance for LED Upgrades
- Conclusion
- Frequently Asked Questions
Last Updated: September 28, 2026
Why LED Headlights Flicker: The Root Causes
Flickering LED headlights almost always come down to one thing: your car's electrical system was built for halogen bulbs, not LEDs. This guide from Autoglo Australia explains why that mismatch happens and how to fix it properly.
Here are the main reasons LED headlights flicker:
- Pulse width modulation (PWM): The car pulses power to control brightness, and LEDs react faster than halogens
- Bulb check systems: Your car sends quick voltage pulses to test if a bulb is working
- CANbus errors: The computer flags the low current draw as a "dead bulb"
- Loose connections: Poor grounding or worn connector pins interrupt power
- Voltage drops: Weak alternator output or old wiring starves the LEDs
- Failing LED driver: The bulb's internal electronics can't hold steady power
Pulse Width Modulation (PWM) and Bulb Check Systems
Pulse width modulation (PWM) is a method cars use to control electrical power by switching it on and off very fast. To a halogen bulb, this looks like steady light. To an LED, it looks like a strobe.
How to Install a CANbus Decoder for LED Headlights
A CANbus decoder is a small module that sits between your car's wiring and the LED bulb, absorbing bulb check pulses to stop error messages and flicker. Most are plug and play: unplug the factory connector, plug in the decoder, then connect the LED bulb.
Step-by-Step Decoder Installation
Total Time: 20-40 minutes Difficulty: Beginner
What You'll Need:
- CANbus decoder modules (one per headlight)
- LED bulbs
- Trim removal tool
- Clean cloth
- Multimeter (optional, for testing)
Step 1: Park and disconnect the battery [Time: 5 minutes] Turn off the engine and remove the negative terminal to prevent short circuits.
Troubleshooting Aftermarket Headlight Wiring
Wiring problems cause more flicker complaints than any other issue, and most faults show up in the grounds and connector pins.
Checking Grounds and Connector Pins
A grounding issue is the most common cause of one-sided flickering. If only one headlight flickers, that side's ground point is usually the culprit. Check for:
- Ground wire: corrosion, fraying, or a loose bolt at the chassis point
- Connector pins: bent, dirty, or pushed-back pins that break contact under vibration
- Wiring harness: pinched or melted wires near hot engine parts
- Wiggle test: with the lights on, gently move the harness, if flicker changes, you've found the fault
- Clean and reseat: use contact cleaner on pins and push them fully home
Why Do LED Headlights Cause Battery Drain?
LED headlights cause battery drain when a faulty decoder or load resistor stays powered after the ignition is off. A correctly installed setup should draw almost nothing when parked, and LEDs use far less power than halogens, so if your battery is going flat, something else is the drain.
Common causes of battery drain after an LED upgrade:
- Cheap decoders that don't fully switch off
- Miswired resistors that stay connected to a live circuit
- A failing LED driver with an internal short
- Accessory wiring tapped into a permanent power source
- A weak battery or alternator that was already struggling
Diagnostic Tools and Testing Procedures
A basic digital multimeter is the single most useful tool for diagnosing flickering LED headlights. It tells you whether the fault is supply voltage, ground, wiring resistance, or the bulb's own driver. What most guides skip is how to test and what the numbers mean on a modern vehicle. Understanding these electrical fluctuations provides a foundation for fixing flickering lights that often extends beyond automotive systems into the complex wiring found in residential environments.
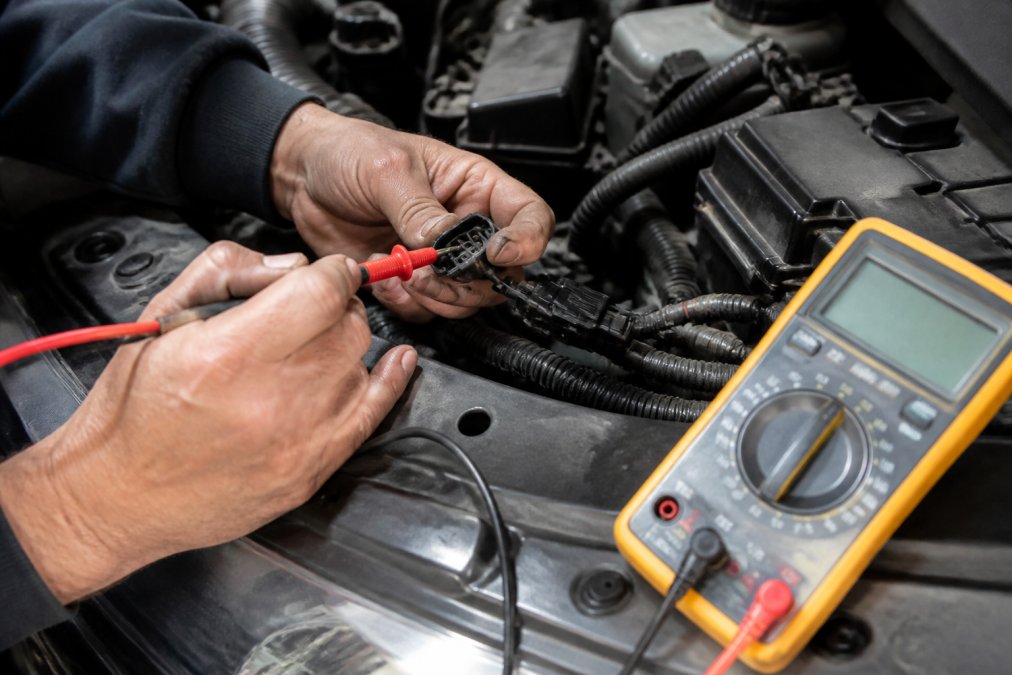
What You Need
- Digital multimeter with a 20V DC range and a continuity (ohms) mode
- Clamp meter (for current draw, optional but useful)
- OBD2 scan tool or a basic CANbus-capable reader
- A helper to switch the lights on and off while you probe
- Insulation-piercing probes or back-probe pins so you don't damage connector seals
Step 1: Establish a Baseline at the Battery
Engine off, headlights off, measure across the battery terminals:
- 12.4-12.7V, healthy resting voltage
- Below 12.2V, battery discharged or failing; charge and retest before chasing flicker
Now start the engine and re-measure:
- 13.8-14.4V, normal charging output
- Below 13.5V, alternator or regulator issue; flicker may be a symptom, not the cause
Step 2: Measure Voltage at the Headlight Plug
With the engine running and headlights on, back-probe the supply and ground pins at the bulb connector and compare to your battery reading:
- Within 0.3V, wiring is healthy
- 0.5V or more lower, a voltage drop; the wiring, relay, or ground is the problem, not the bulb
Step 3: Test the Ground Circuit
Set the meter to continuity or resistance, lights off, and probe from the bulb connector's ground pin to a known clean chassis point:
- Near zero ohms, ground is good
- More than about 1 ohm, corrosion, a loose bolt, or a frayed strap; clean, retighten, and retest
Step 4: Check Current Draw
Clamp the meter around the supply wire with the bulb lit and compare to the bulb's rated current (printed on the packaging or driver):
- Much lower than rated, the driver is limiting output, often due to a bulb-check pulse or thermal throttling
- Much higher than rated, a short or a miswired load resistor
Step 5: Read the Vehicle's Own Diagnostics
Plug in an OBD2 reader or scan tool and look for lighting-circuit codes. On many modern vehicles you'll see bulb-out or lamp-failure warnings, body control module (BCM) lighting codes, or PWM duty-cycle faults on the headlight circuit. These confirm the car is rejecting the LED's low current draw, clearing them without fixing the cause just resets the flicker.
PWM vs Constant-Current Systems: Why the Test Differs
How you interpret your readings depends on how your vehicle drives its headlights.
- PWM-driven circuits (common for daytime running lights and tail lamps) switch the supply on and off rapidly. A basic multimeter shows an averaged voltage that looks normal even when the LED is strobing, you need a duty-cycle or frequency function, or an oscilloscope, to see the pulses.
- Constant-current circuits supply a steady voltage, so a flicker almost always points to a voltage drop, a bad ground, or a failing driver, and a plain multimeter reading is meaningful.
| Test | Tool | Healthy Reading | Likely Fault If Wrong |
|---|---|---|---|
| Battery voltage (engine off) | Multimeter | 12.4-12.7V | Weak or discharged battery |
| Charging output (engine running) | Multimeter | 13.8-14.4V | Alternator or regulator |
| Voltage at bulb plug | Multimeter | Within 0.3V of battery | Voltage drop in wiring or relay |
| Ground continuity | Multimeter | Near zero ohms | Corroded or loose ground |
| Current draw | Clamp meter | Matches bulb rating | Faulty driver, decoder, or resistor |
| PWM duty cycle | Meter with duty function | Steady, within spec | Bulb-check pulse or BCM signal |
Heat Dissipation and Thermal Management
LED bulbs run cooler than halogens overall, but the heat they generate is concentrated in a tiny area, the LED chips and driver electronics. Poor thermal management shortens bulb life and causes flicker as the driver throttles power to protect itself.
The Mechanism: Why Heat Causes Flicker
Every quality LED bulb has a heatsink, and often a small fan, built into the base. Heat moves from the LED chips, through a metal core board, into the heatsink, and out into the air inside the headlight housing.
The Timing Tell
A useful diagnostic pattern:
- Flickers immediately on switch-on, electrical cause (PWM, bulb check, ground, voltage drop)
- Flickers after 5-15 minutes, thermal cause; the driver is throttling
- Flickers only on high beam or only in summer, thermal margin is marginal; the bulb is undersized for the duty cycle
If the flicker appears only when hot, let the bulb cool fully and retest. If it works cold and fails hot, you've confirmed thermal throttling.
Housing Type Changes Everything
Not all headlight housings shed heat equally.
- Reflector housings are open and airy, but fitting an LED into a halogen reflector scatters light and is a separate compliance problem.
- Projector housings are enclosed and trap heat around the bulb base, so LED bulbs run hotter and throttle sooner.
- Sealed dust covers are the single biggest cause of thermal flicker. Many LED kits need a vented or extended dust cover to let hot air out; leaving the factory sealed cover on traps heat and cooks the driver.
- Bulb length matters. If the heatsink or fan sits outside the reflector, it can't shed heat into the housing airflow; if it sits inside, it may not fit at all.
Practical Fixes
- Fit a vented or extended dust cover if your kit specifies one. Never wrap the bulb base or heatsink in tape.
- Check fan operation. A noisy, slow, or dead fan means the bulb is cooking itself. Replace the bulb.
- Match the bulb to the housing. A bulb designed for a projector housing manages heat better than a generic unit forced into one.
- Avoid cheap bulbs with tiny heatsinks. They overheat within minutes on high beam and throttle hard.
- Give the heatsink airflow. Don't pack wiring or sound-deadening material around the bulb base.
A Note on Colour Temperature and Heat
Higher colour temperatures (6000K and above) don't inherently run hotter, but cheap high-output bulbs often push the LEDs harder to hit a brightness claim. That extra drive current becomes extra heat, and the driver throttles sooner. A slightly lower colour temperature bulb with a larger heatsink usually flickers less in real-world use.
Safety and Legal Compliance for LED Upgrades
An LED upgrade must meet the road rules in your state or territory, or you risk a defect notice and a failed inspection. Flickering lights are also a safety hazard for you and other drivers.
Australian Design Rules for vehicle lighting
Practical compliance points to check:
- The beam pattern must not dazzle oncoming drivers
- Colour temperature should stay within the legal white range
- The light must be E-marked or ADR-compliant where required
- Flickering or pulsing lights are not roadworthy
- Keep your vehicle roadworthy for registration and insurance
Conclusion
Flickering LED headlights are frustrating, but they're rarely a mystery. Nine times out of ten, the cause is a PWM signal, a bulb check pulse, a bad ground, or a decoder that doesn't switch off. Work through the causes in order, test with a multimeter, and you'll find the fault.
Frequently Asked Questions
Can flickering LED headlights be repaired?
Yes, most flickering LED headlights can be repaired. The fix depends on the cause. If the issue is a CANbus error, installing a decoder or load resistor usually solves it. For wiring problems, checking and securing connections or grounds is the fix. If the LED driver itself is faulty, you may need to replace the bulb. Start by identifying the root cause with a multimeter before buying parts.
Do I need a CANbus decoder to stop LED flickering?
You need a CANbus decoder if your vehicle's computer uses bulb-check pulses that cause flickering. Many modern cars send rapid pulses through the headlight circuit to detect blown bulbs. LEDs draw less current, so the car thinks the bulb is out and pulses the voltage. A decoder or anti-flicker module stabilises the current, stopping the flicker and preventing dashboard error messages.
Is it legal to drive with flickering headlights in Australia?
No, driving with flickering headlights is not legal in Australia. All road vehicles must comply with the Australian Design Rules (ADRs), which require steady, white light from headlights. Flickering or strobing lights can dazzle other drivers and fail a roadworthy inspection. If your LEDs flicker, fix the issue before driving. Ensure your upgrade meets ADR requirements for beam pattern and colour.
Why do my LED headlights flicker after an aftermarket upgrade?
Flickering after an upgrade usually happens because the new LEDs draw less current than the original halogen bulbs. The car's computer detects this lower load as a fault and sends pulses to check the circuit. This is common in vehicles with CANbus systems. Installing a load resistor or CANbus decoder mimics the halogen load, stopping the flicker and clearing any dashboard warnings.
Flicker-free lighting shouldn't be a battle. Autoglo Australia offers high-quality LED headlights, projector headlights, and taillights, plus the accessories to get the install right the first time. With support for a wide range of makes and models and monthly featured product sales, it's a straightforward way to upgrade. Get started with Autoglo Australia and enjoy brighter, steadier, road-legal lighting.