

Table of Contents
- Step 1: Clean Your Windscreen and Windows Inside and Out
- Step 2: Inspect and Clean Your Headlights
- Step 3: Check Headlight Aim and Alignment for Better Visibility
- Step 4: Upgrade to Projector Headlights for Night Driving
- Step 5: Reduce Night Glare While Driving
- Step 6: Adjust Your Speed and Following Distance
- Step 7: Use High Beams Safely and Check Your Vision
- Pre-Drive Visibility Checklist
- Frequently Asked Questions
Last Updated: October 11, 2026
Step 1: Clean Your Windscreen and Windows Inside and Out
A dirty windscreen scatters oncoming headlight glare directly into your eyes. At Autoglo Australia, we recommend starting to improve night driving road visibility with this simple but critical step: clean glass everywhere.
Start with the inside of your windscreen using a microfiber cloth and automotive glass cleaner, working in straight lines. Pay special attention to the top edge where dust accumulates; interior grime is often the worst offender for night glare.
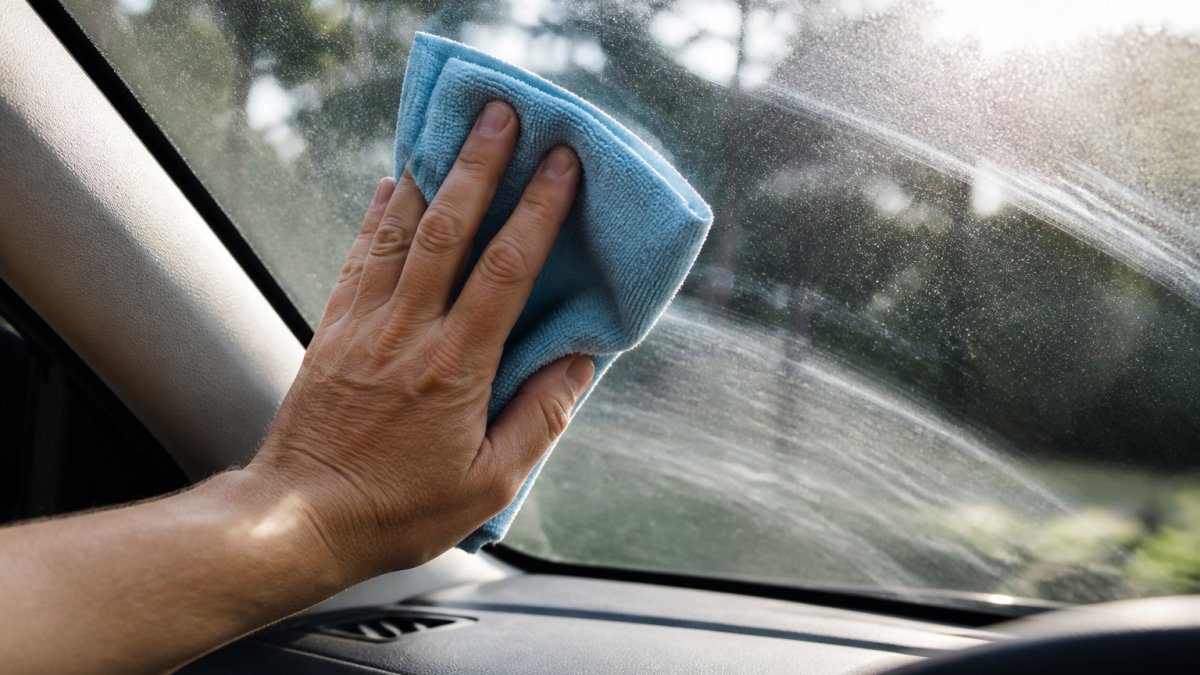
Clean the outside using a two-bucket method (soapy water and rinse water) to prevent scratching. Dry with a clean microfiber cloth and clean side mirrors and rear window.
This step can improve your ability to see the road in low-light conditions and takes under 10 minutes.
Step 2: Inspect and Clean Your Headlights
Your headlights are only effective if clean and fully functional. Over time, the plastic lens develops a cloudy film from UV exposure and oxidation, reducing light output. A 10-minute inspection can reveal problems before they become unsafe.
DIY Headlight Inspection Walkthrough
Start in daylight or in a dark garage with the engine running. Turn on your low beams and look at each headlight from the front of the vehicle. Check for these common issues:
Burned-out bulbs: If one headlight is noticeably dimmer or completely dark, a bulb has failed. Check your owner's manual for the correct type (typically H7, H11, or 9006). Replacement bulbs take 5-10 minutes to install. Wear gloves when handling to avoid skin oils damaging the bulb.
Cloudy or yellowed lenses: If the lens appears hazy or has a milky white film, oxidation has begun. Minor cloudiness won't significantly affect visibility, but moderate to heavy cloudiness warrants restoration or replacement.
Cracks or moisture inside the lens: Inspect the lens edges and the seal where the lens meets the housing. If you see cracks, moisture droplets inside the headlight, or signs of water damage, the lens seal has failed. This is a safety issue because water reduces light output and can cause electrical problems. Replacement is the safest option. Neglecting these structural compromises often leads to broader visibility hazards, much like the risks associated with cracked windshield safety that can impair your overall field of view.
Beam pattern check: In a dark garage, aim low beams at a wall 3 metres away. The beam should form a clear pattern with a sharp cutoff line. If fuzzy or uneven, the reflector may be damaged or the lens too cloudy.
Restoration vs. Replacement
For minor to moderate cloudiness, a headlight restoration kit can be effective and takes 30-45 minutes per headlight. Results typically last 6-12 months.
For heavy oxidation, cracks, or moisture damage, replacement is the better choice. LED projector headlights offer superior brightness and durability.
Professional inspection option
If unsure whether your headlights are safe, a service centre can perform a brightness test using a photometer. The technician can recommend restoration or replacement based on the results.
Check headlights monthly and clean them whenever you notice reduced brightness. A quick inspection before long night drives can prevent visibility problems.
Step 3: Check Headlight Aim and Alignment for Better Visibility
Misaligned headlights waste light and can blind oncoming drivers. Your headlights must point at the correct angle: high enough to illuminate the road, but low enough to avoid blinding other drivers.
Most vehicles have manual headlight aim adjustment screws behind the assembly. Park 3 metres from a wall, turn on low beams, and mark where the light hits. The beam should be slightly lower on the driver's side.
If adjustment is needed, locate the adjustment screws and turn them slowly; a quarter turn makes a noticeable difference. A professional alignment check takes 15-20 minutes and costs very little.
Step 4: Upgrade to Projector Headlights for Night Driving
Upgrading from factory halogen to LED projector headlights is one of the most effective ways to improve night driving road visibility. Projector headlights use a lens and reflector system that focuses light into a sharp beam, delivering more usable light than reflector-style halogen units.
LEDs produce more light per watt than halogen bulbs and last 10,000+ hours compared to 1,000 hours for halogen.
Autoglo Australia offers premium LED headlight upgrades for most vehicle makes and models. Our Autoglo Australia LED Headlights for Toyota Land Cruiser J100 feature high-intensity LED illumination, sequential turn signals, and start-up animation effects. These headlights are plug-and-play replacements with no rewiring needed. They're engineered specifically for your vehicle, so fitment is perfect and compatibility is guaranteed.

Step 5: Reduce Night Glare While Driving
Oncoming headlights create glare that temporarily blinds you. Modern LED and HID headlights are significantly brighter than halogen units and can be more glaring. Understanding how to manage this glare safely is essential for night driving confidence.
Why Modern Headlights Cause More Glare
LED and HID headlights produce 2-3 times more light output than halogen bulbs, increasing glare for oncoming traffic. Misaligned LED headlights are particularly problematic.
Autoglo Australia LED Headlights For Toyota Land Cruiser (J100) 1998-2007 Start →
Safe Glare Management Techniques
Avoid direct eye contact with the source: Do not stare at oncoming headlights. Shift your gaze to the right edge of your lane or road markings. Your peripheral vision will detect the oncoming vehicle without the blinding effect.
Use your vehicle's anti-glare mirror: Most vehicles have a rearview mirror with a dimming lever or button at the base. Flip it toward you to activate anti-glare mode. Some modern vehicles have automatic anti-glare mirrors. Check your owner's manual for your vehicle's feature.
Adjust side mirrors downward slightly: Angle side mirrors down 5-10 degrees to reflect the road surface rather than oncoming headlights, reducing peripheral glare.
Reduce speed and increase following distance: Slower speeds give your eyes more time to recover from glare. In heavy traffic with significant glare, reduce speed by 10-15 km/h and increase following distance to 4-5 seconds.
Anti-reflective coatings for prescription lenses
If you wear prescription glasses or contact lenses, anti-reflective (AR) coatings can reduce glare and improve contrast sensitivity at night. AR coatings work by minimising reflections on the lens surface, allowing more light to pass through to your eyes.
AR coatings can significantly improve night driving comfort, especially if you're sensitive to glare. Note that AR coatings require careful cleaning (use only lens-specific wipes and solutions) and may need replacement every 2-3 years as the coating can wear or scratch.
Yellow-tinted night-driving glasses: Limited benefit
Yellow-tinted or amber-tinted glasses are marketed for night driving because they theoretically increase contrast by filtering blue light. However, evidence for their effectiveness is mixed.
When to seek professional help
If glare remains a significant problem after applying these techniques, or if you find yourself squinting excessively or experiencing eye strain during night drives, schedule an eye examination.
Step 6: Adjust Your Speed and Following Distance
Speed is your most powerful tool for managing low-visibility conditions. The faster you drive, the less time you have to react to hazards you can't see clearly.
On dark roads with limited lighting, reduce your speed by 10-20 km/h compared to daytime driving. This gives your eyes more time to process what they see and gives your vehicle more time to stop. A vehicle travelling at 80 km/h needs significantly more distance to stop than one travelling at 60 km/h.
Increase your following distance to at least 4 seconds behind the vehicle ahead. In poor visibility, aim for 6 seconds. This means if the car ahead brakes suddenly, you have time to react and stop safely.
Check your speedometer regularly at night. It's easy to drift faster than you realise when visibility is reduced. Use road markings and reflectors to judge your position and speed.
Step 7: Use High Beams Safely and Check Your Vision
High beams illuminate more of the road ahead and further into the distance. Use them on dark roads with no oncoming traffic. Switch to low beams when you see oncoming vehicles or when following another car.
Many modern vehicles have automatic high beam systems that switch between high and low beams based on traffic detection. These systems improve visibility while reducing glare to other drivers. Check your vehicle's manual to see if you have this feature.
Your own vision matters as much as your vehicle's lighting. If you wear prescription glasses or contact lenses, make sure your prescription is current. Have your eyes checked annually, especially if you drive frequently at night. Reduced contrast sensitivity and slower adaptation to glare are signs of aging vision, and they're common reasons for night driving difficulty.
If you notice that night driving feels harder than it used to, schedule an eye exam. Many vision problems are easily corrected.
| Step | Action | Impact |
|---|---|---|
| 1 | Clean windscreen and windows | Reduces glare by 20-30% |
| 2 | Inspect and clean headlights | Restores light output |
| 3 | Check headlight alignment | Improves beam focus and safety |
| 4 | Upgrade to LED projector headlights | Significantly improves visibility |
| 5 | Reduce glare with anti-reflective coatings | Improves contrast and adaptation |
| 6 | Adjust speed and following distance | Increases reaction time |
| 7 | Use high beams correctly and check vision | Maximises available light |
Pre-Drive Visibility Checklist
Before any night drive, run through this quick checklist to ensure your vehicle and vision are optimised for safe driving.
- Windscreen and windows are clean inside and out
- Headlights are clean and bright
- Headlight beams are properly aligned
- All vehicle lights (brake lights, tail lights, side markers) are working
- Mirrors are clean and adjusted correctly
- Prescription glasses or contact lenses are current
- You're well-rested and alert
- Weather conditions are clear or you've adjusted your speed
- Fuel level is adequate for your journey
- You've planned your route and know where you're going
This checklist takes 5 minutes and can prevent accidents. Make it a habit before long night drives.
Improving night driving visibility starts with the basics: clean glass, working headlights, and proper alignment. If you're still struggling with visibility after these steps, upgrading to premium LED headlights is the next logical choice. Autoglo Australia's LED headlight systems are engineered to deliver superior brightness, reliable performance, and a perfect fit for your specific vehicle. Our projector headlights improve visibility in low-light conditions while adding a modern aesthetic to your vehicle. Explore our full range of LED headlights and accessories today, and experience the difference that professional-grade lighting makes for your safety and confidence on night roads.
Frequently Asked Questions
How can I improve night driving road visibility without upgrading my headlights?
Start with the basics: clean your windscreen, windows, and headlights thoroughly to remove dirt and grime that scatter light. Check that your headlights are properly aligned so the beam reaches the road ahead effectively. Reduce your speed and increase your following distance to give yourself more time to react. Have your eyes tested by an optometrist to ensure your prescription is current. These steps often make a significant difference before considering equipment upgrades.
Do projector headlights for night driving really improve visibility compared to standard headlights?
Yes. Projector headlights use a focused lens system that concentrates light onto the road with a sharper beam pattern, reducing scatter and improving depth perception in darkness. Unlike older reflector designs, projectors deliver more usable light exactly where you need it. Modern LED projector headlights like those from Autoglo Australia offer superior brightness and beam control, making it easier to spot obstacles, road markings, and lane boundaries at night.
How do I reduce night glare while driving from oncoming headlights?
Reduce night glare while driving by looking slightly down and to the right when oncoming traffic approaches, avoiding direct eye contact with their headlights. Clean your windscreen regularly to prevent light scatter. Consider anti-reflective coatings if you wear prescription glasses. Avoid using high beams when other vehicles are present. If glare is severe, slow down and let your eyes adjust. Modern vehicles with automatic high beam control can help, but manual awareness is your best defence.
What should I check before driving at night to ensure safe visibility?
Before driving at night, verify that both headlights are functioning and aligned correctly. Clean your windscreen, windows, and headlight lenses to remove dust and grime. Check your mirrors for cleanliness. Ensure your prescription glasses or contact lenses are current if you wear them. Test your high beams and automatic high beam function if equipped. Plan your route to avoid unfamiliar dark roads if possible. This pre-drive checklist takes five minutes and significantly improves your safety and confidence.